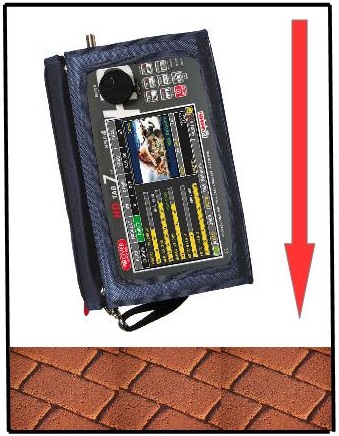
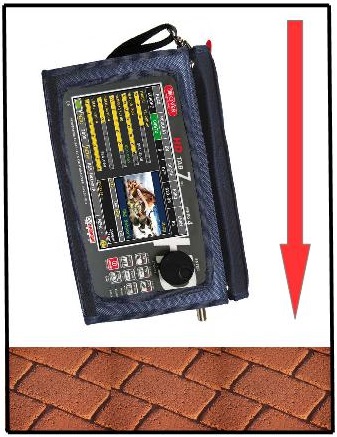
If your instruments is accidentally dropped by more than a meter (see Figures 1 and 2), the display is not broken and has no aesthetic damage but works intermittently, or will not turn on, etc.; probably the CPU board has come out (despite the three blocks of security).
To check if the card has slipped out of the connector and repair your instrument, follow the instructions below, (and without using any tools but with just hands), replace the card firmly into the CPU connector.
 |
 |
| Figure 1: Fall of the instrument with the display facing down. The instrument may continue to function properly |
Figura e: Fall of the instrument with the display facing upwards. The CPU board could come out of the 3 blocks of safety |
Here are the instructions on how to repair the instrument when dropped by more than 1 meter:
A) Turn off the instrument;
B) Remove the ENCODER knob;
C) Remove the instrument from the bag;
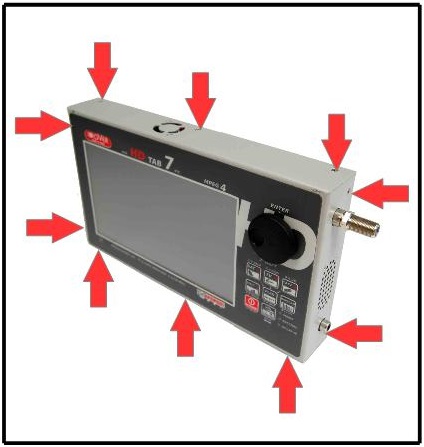
D) Remove the 10 screws with a suitable screwdriver (Figure 3) and open the instrument;
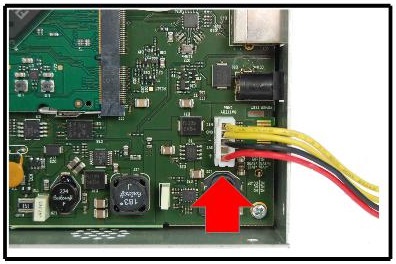
E) Remove the BATTERY connector from the motherboard (no tool only with your fingers ) (Figure 4);
 |
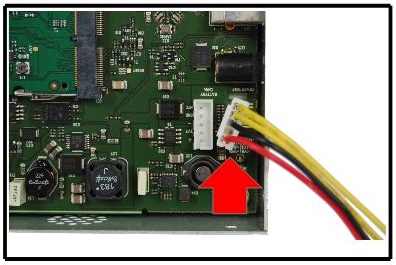 |
| Figure 3: To open the instrument | Figure 4: Removing the battery connector |
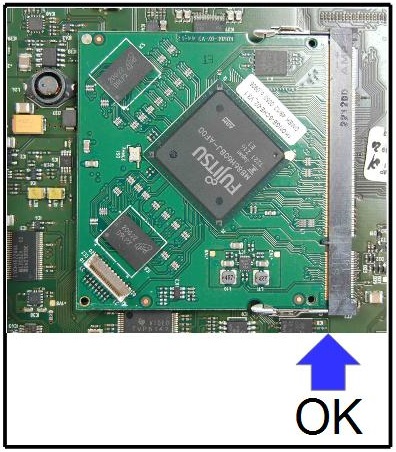
F) Check the status of CPU card into the connector:
 |
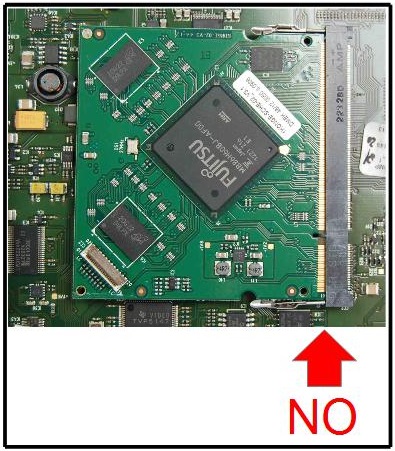 |
| Figure 5: CPU card properly inserted into the connector | Figure 6: The CPU board, as a result of accidental fall has come out slightly from the connector |
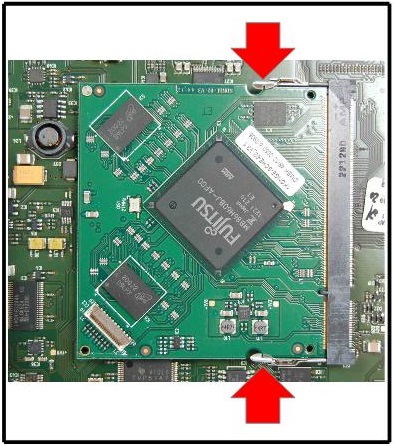
G) Using just your fingers, (with no mechanical tools) insert the CPU board, lightly pushing and verify that the 3 blocks are returned in safety seat, see Figure 7 and 8;
 |
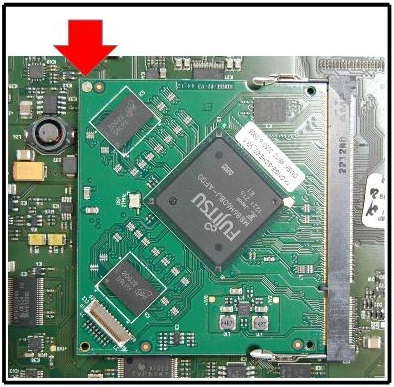 |
| Figure 7: Blocks of security metal CPU board | Figure 8: Security Lock Nylon CPU board |
H) Reconnect the BATTERY connector to the motherboard (Figure 9);
I) Tighten the 10 screws (Figure 10) and close the instrument;
 |
 |
| Figure 8: Inserting battery connector | Figure 9: Closure of the instrument |
L) Insert the instrument in to the bag;
M) Place the ENCODER knob;
N) Turn on the instrument and verify proper operation.
Note: