ROVER meters, using the latest technology where the hardware is looking more and more like a computer. For this reason, in the event of loss of TV & SAT memory plans, should be performed “FORMAT HARD DISK” to clean the memories, before reloading the TV & SAT memory plans.
Below we listed the procedures for “FORMAT HARD DISK” valid ONLY for models with SINGLE DISPLAY COLOR:
| PREREQUISITES: Before carrying out the procedure “FORMAT HARD DISK”, make sure you have accomplished all the following points: |
||||
1) Being already registered in the ROVER web site “SW UPDATE” area;
|
||||
| 2) If you are already registered, run directly the “Login” typing your “Username” and “Password”; | ||||
| 3) Download in the desktop of your PC, the ROVER S.M.A.R.T. interface program; | ||||
| 4) Install the ROVER S.M.A.R.T. interface program in your PC (only the first time);
N.B.: If the ROVER S.M.A.R.T. interface program is already installed in your PC, check that it is the LATEST version and always delete the old one;
|
||||
5) Select the exact model of your Instrument and click on the “GO” button;
|
|
FORMAT HARD DISK – Only for this models: EASY METER series, HD TAB 4 series, HD LIGHT, HD COMPACT, HD TAB 7 series, MASTER SAT Evo* For other models scroll down the page |
||||
| Warning: The following porcedure erases the memory of the instrument. At the end, you will have to reload the Instruments Software and TV and SAT memory plans. | ||||
| 1) Switch-on the instrument (press once the red POWER ON button to display on the screen the main HOME MENU); | ||||
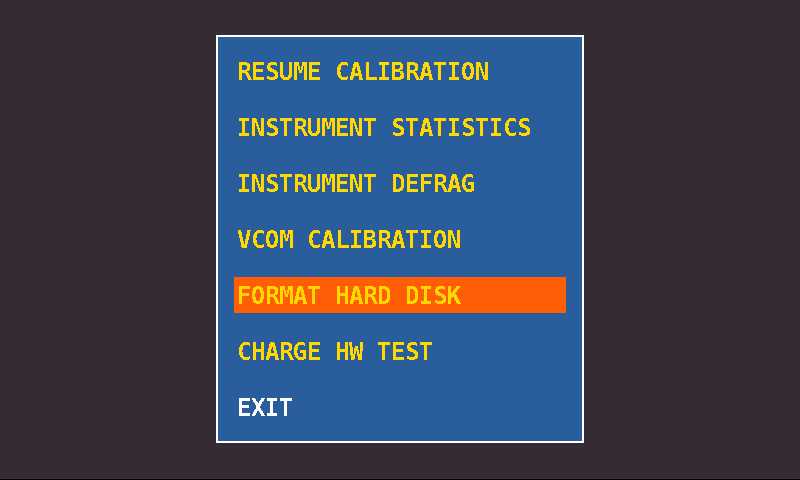
| 2) Press and HOLD for at least 10 seconds SIMULTANEOUSLY the 3 mechanical buttons, SPECT, PLAN and VOLUME *(NOTE: Only for MASTER SAT Evo SPECT, SAT and VOLUME) and wait until on the instrument appears the menu shown in Figure 1; | ||||
 |
 |
|||
| Figure 1: Menu selection “FORMAT HARD DISK” |
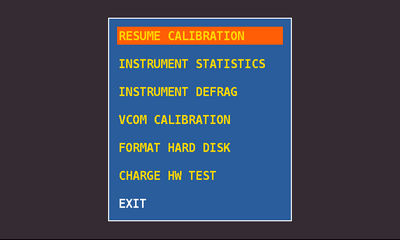
Figure 2: Menu selection “RESUME CALIBRATION” |
|||
| 3) Select “FORMAT HARD DISK” (Figure 1), press the encoder (ENTER) and wait for the execution of the process; | ||||
| 4) Select the “RESUME CALIBRATION” (Figure 2), press the encoder (ENTER) and wait for the execution of the process; | ||||
| 5) When the process is completed switch-off the instrument; | ||||
| 6) Switch-on the instrument and immediately after press and hold the VOLUME button until the completion of the start-up function; | ||||
7) Load the SW (previously saved on the desktop of your PC);
|
||||
| 8) Switch-off the instrument; | ||||
| 9) Switch-on the instrument and immediately press and hold the VOLUME button until completion, after release the button; | ||||
10) Load the TV and SAT memory plans (previously saved on the desktop of your PC);
|
||||
|
11) When finished, switch-off the instrument and switch-on again after 10 seconds to verify proper operation.
|
||||
|
FORMAT HARD DISK – Only for this models: ATOM LIGHT series, ATOM POWER, DIGICUBE, TOUCHMETER and HD TOUCH |
||||
| Warning: The following porcedure erases the memory of the instrument. At the end, you will have to reload the instruments Software and TV and SAT memory plans. | ||||
| 1) Switch-on the instrument (press once the POWER button to display on the screen the main HOME MENU); | ||||
| 2) Press and HOLD for at least 10 seconds SIMULTANEOUSLY the 2 mechanical buttons, SPECT and VOLUME and wait until on the instrument appears the menu shown in Figure 1; | ||||
 |
 |
|||
| Figure 1: Menu selection “FORMAT HARD DISK” |
Figure 2: Menu selection “RESUME CALIBRATION” |
|||
| 3) Select “FORMAT HARD DISK” (Figure 1), press the encoder (ENTER) and wait for the execution of the process; | ||||
| 4) Select the “RESUME CALIBRATION” (Figure 2), press the encoder (ENTER) and wait for the execution of the process; | ||||
| 5) When the process is completed switch-off the instrument; | ||||
| 6) Switch-on the instrument and immediately after press and hold the VOLUME button until the completion of the start-up function; | ||||
7) Load the SW (previously saved on the desktop of your PC);
|
||||
| 8) Switch-off the instrument; | ||||
| 9) Switch-on the instrument and immediately press and hold the VOLUME button until completion; | ||||
10) Load the TV and SAT memory plans (previously saved on the desktop of your PC);
|
||||
|
11) When finished, switch-off the Instrument and switch-on again after 10 seconds to verify proper operation.
|
||||