For the HD TAB 4, 7, 700, 900 & 9
For TAB 5 & 7 ULTRA series
For the EASY METER by PRIME DIGITAL series
For the HD LIGHT, COMPACT, FLASH, TOUCH, PRO & PROTAB
Using the instrument keyboard you can create directly in the instrument, MANUAL MEMORY PLANS, such as MANU 1, MANU 2, MANU 3, etc., by storing a list of your favorite TV channels.
STANDARD PROCEDURE:
1) Turn on the instrument,
2) Make sure you have selected your language,
3) Make sure you have selected the TV or CATV operation mode,
4) Rotate the encoder and select the “MEMORY” icon (see figure 1),
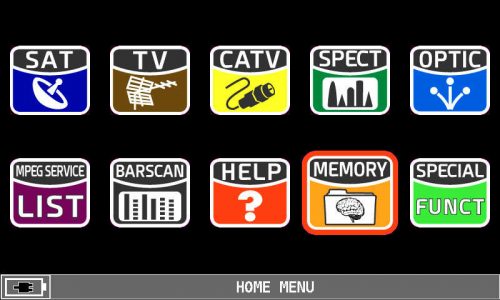 |
| Figure 1: HOME MENU – MEMORY icon selection |
5) Press the encoder to confirm,
6) Rotate the encoder and select “AUTOMEMORY TV” (see figure 2),
7) Press the encoder to confirm,
8) Rotate the encoder and select the “TO FILE N:” (destination) item (see figure 2),
9) Press the encoder to confirm,
10) Rotates the encoder and selects the desired memory location, such as AUTO 1, AUTO 2, AUTO 3, etc. where to save the result of automatic search (see Figure 2),
11) Press the encoder to confirm,
12) Rotate the encoder and select “LEVEL:” (see figure 2),
13) Press the encoder to confirm,
14) Rotate the encoder and set the minimum level of ANALOGUE channels to be searched (only if present or distributed within the system),
15) Press the encoder to confirm,
16) Rotate the encoder and select the item “POWER” (see figure 2),
17) Press the encoder to confirm,
18) Rotates the encoder and sets the minimum power threshold of DIGITAL channels to be searched,
19) Press the encoder to confirm,
20) Rotate the encoder and select “DISCOVERY:” (see Figure 2),
21) Press the encoder to confirm,
22) Rotates the encoder and selects the desired signal recognition (DISCOVERY) mode:
24) Rotate the encoder and select the item “DC@RF:” (see figure 2),
23) Press the encoder to confirm,
25) ONLY if necessary, press the encoder to confirm and rotate to select the power supply voltage to be provided to the system (Pole Switch, Line Amplifier, etc.): 5V–12V–18V or 24V, the encoder to confirm,
26) Rotate the encoder and select “START SAVE?” (see Figure 2),
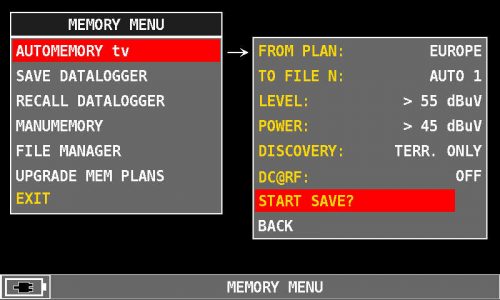 |
| Figure 2: START SAVE? selection |
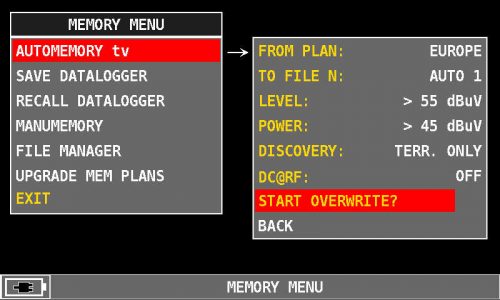 |
| Figure 3: START OVERWRITE? selection |
27) Press the encoder to start the search and create a new channel plan (see figure 4),
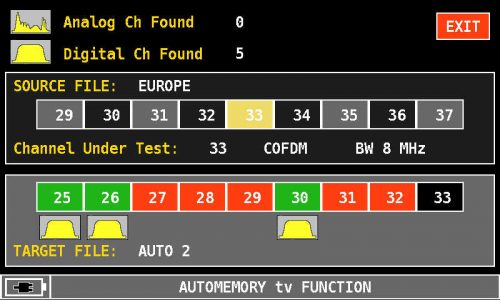 |
| Figure 4: Automatic scan of current channels |
28) Wait a few minutes at the end of the search, the instrument will show the recorded analog and digital channels at the top and the word “COMPLETED – EXIT” will appear (see figure 5),
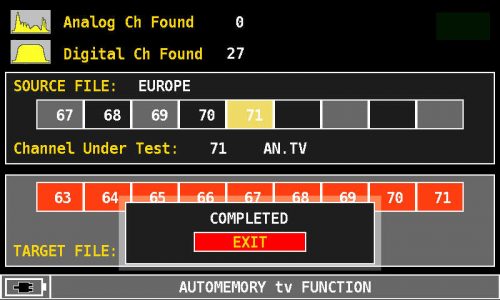 |
| Figure 5: Searching for COMPLETED channels |
29) Press the encoder to exit the screen or press the “TV” key directly to perform the measurements or the “SPECT” key to display the spectrum of the received signal directly in the new auto memory plan created: eg AUTO 1, AUTO 2, AUTO 3, etc.,
30) To recall the AUTOMATIC MEMORY plan (in our example AUTO 1) press the “PLAN” key, rotate the encoder to “AUTOMEMORY tv”, press the encoder, rotate the encoder on the “AUTO 1” and then directly selects the relevant operating mode: MEAS (measurement), SPECT (spectrum), etc. (see figure 6),
31) Press the encoder to go directly to the selected fusion.
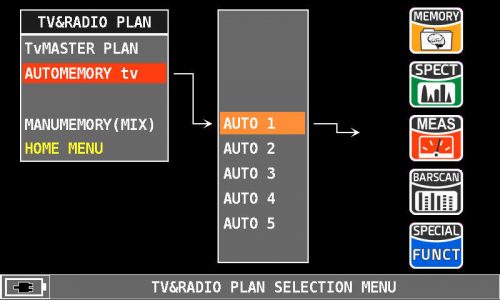 |
| Figure 6: Selecting the AUTO 1 memory plan |
NOTE: The MENU (written and graphic) of the figures shown in the following “F.A.Q.” may vary from model to model or depending on SW upgrade and without notice.